Adding a custom domain to the Tygrys system
Tygrys system, after it is deployed and activated, is ready to use right away. You can add users, and they can connect and use services.
However, a new and fresh deployment is configured to use a default domain which looks like your-company.tygrys.one. This is all working and functional and gives you an easy way to use the system right away. However, if you want to use a more personalized internet address, like: your-company.com you need to add a custom domain to the system.
We put a lot of effort to make it as easy as possible with minimal technical knowledge required. But if you are stuck in the process, continue reading to learn more about details.
If you are still stuck, worry not. Contact us using a support link on the Admin UI to get help from our team.
In this example with have an example photographer business, which offers wedding photography. It is called “My Wedding Photos”. Peter is the photographer and the owner of the business. He created a Tygrys system to communicate with customers of email and chat, and also to manage his photography projects.
He initially, provided “mywedding-photos” as the name of the subscription, and the default internet address for this installation, his email and chat address is mywedding-photos.tygrys.one. This works but Peter wants to have personalized internet address which looks professional and is easier to remember by his customers.
He did some research, and he actually found that in his case, it would be best if he had two internet addresses: mywedding-photos.com and my-wedding.photo. The first one has a more common form, and probably more people on the internet are used to, but the second one is far more personal and it looks way better.
He registered both addresses (internet domains) on the Amazon cloud, and now he is going to add them to the Tygrys system.
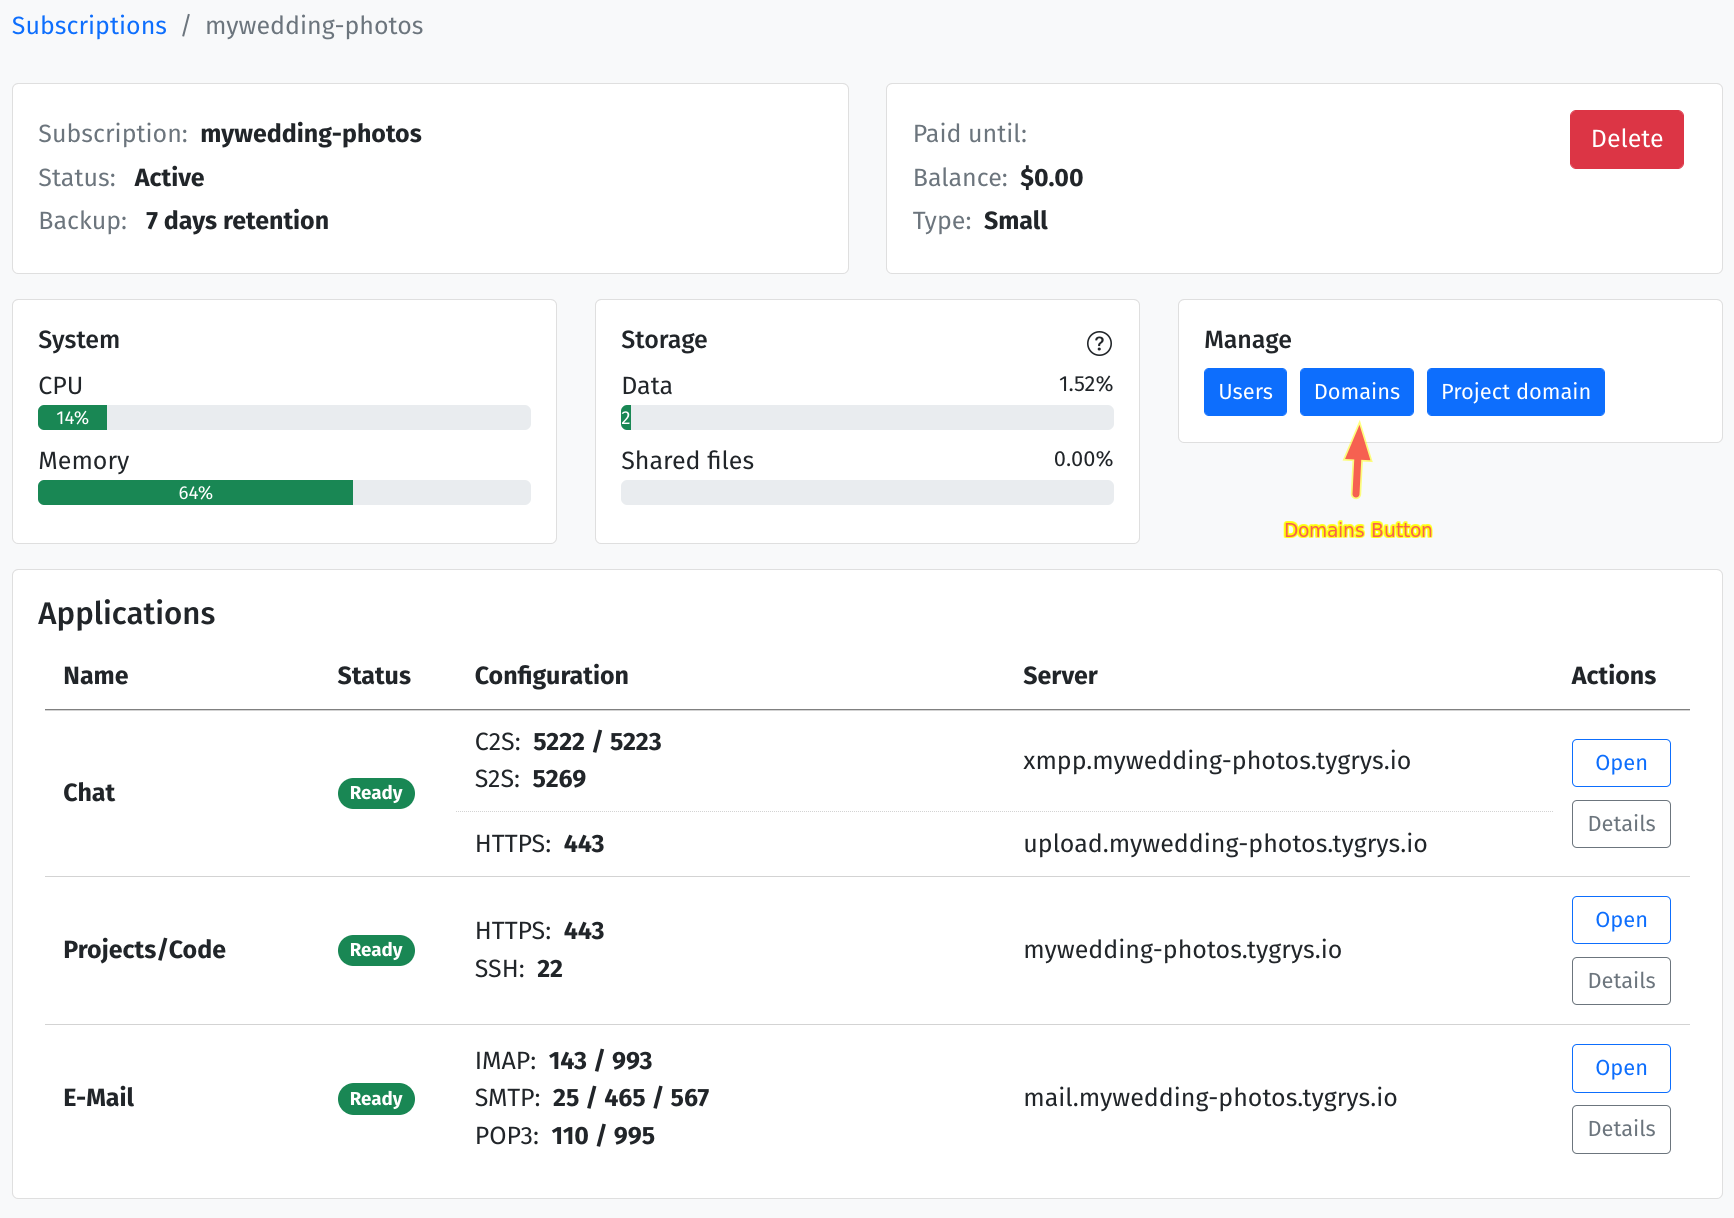 To add a new domain you have to go to the subscription page. Click on the “Domains” blue button, you will be
taken to domains management page.
To add a new domain you have to go to the subscription page. Click on the “Domains” blue button, you will be
taken to domains management page.
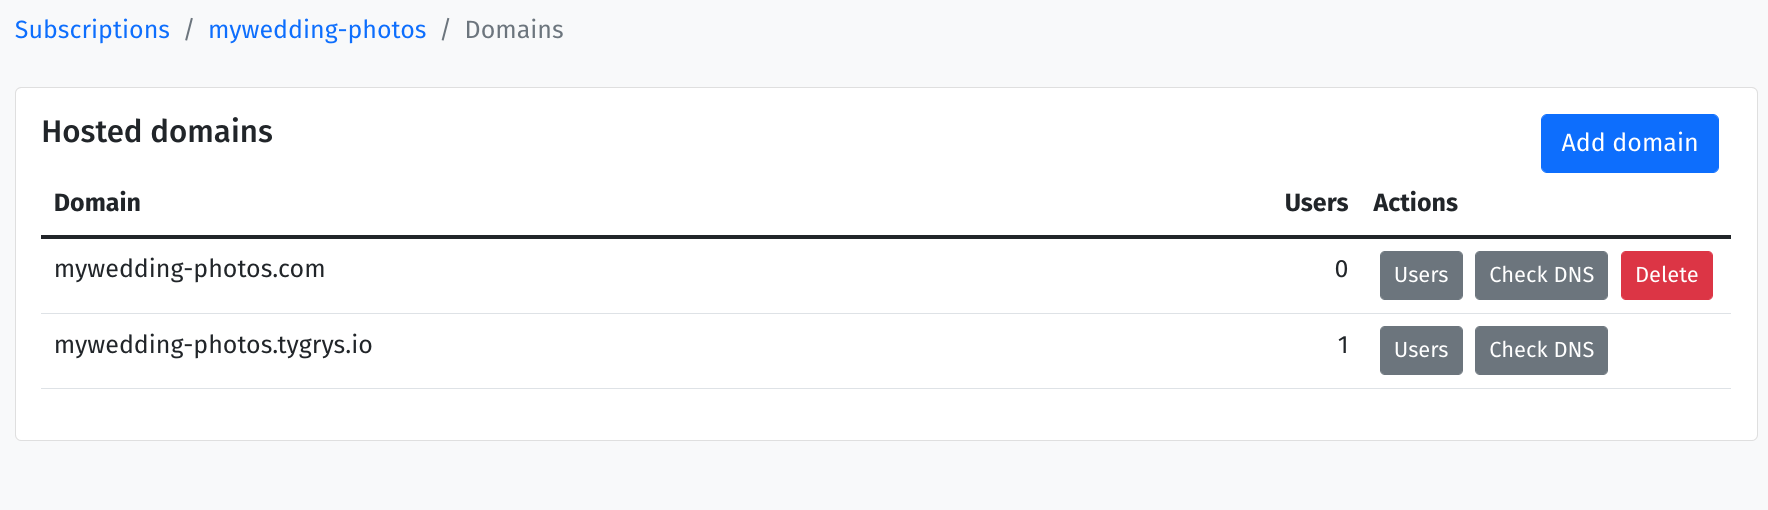
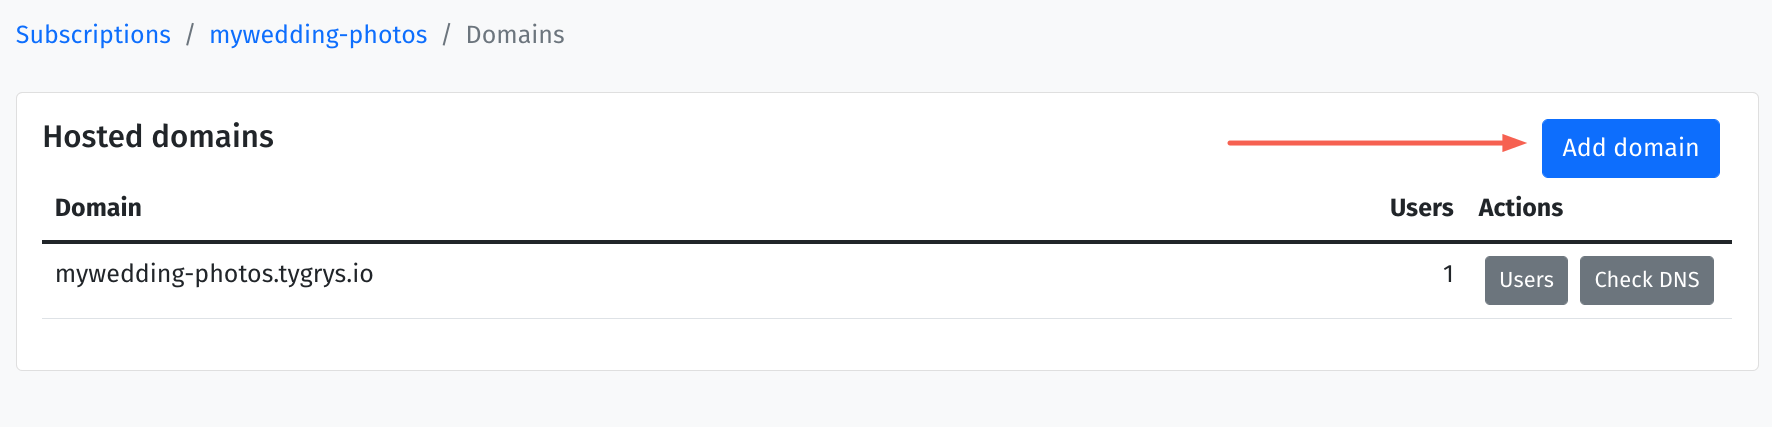 Here you have a list of all internet addresses (DNS domains) added to your installation. Right now, there is just
one domain, the default one, automatically generated during the system setup.
Here you have a list of all internet addresses (DNS domains) added to your installation. Right now, there is just
one domain, the default one, automatically generated during the system setup.
To add a new domain, simply click on the “Add domain” blue button.
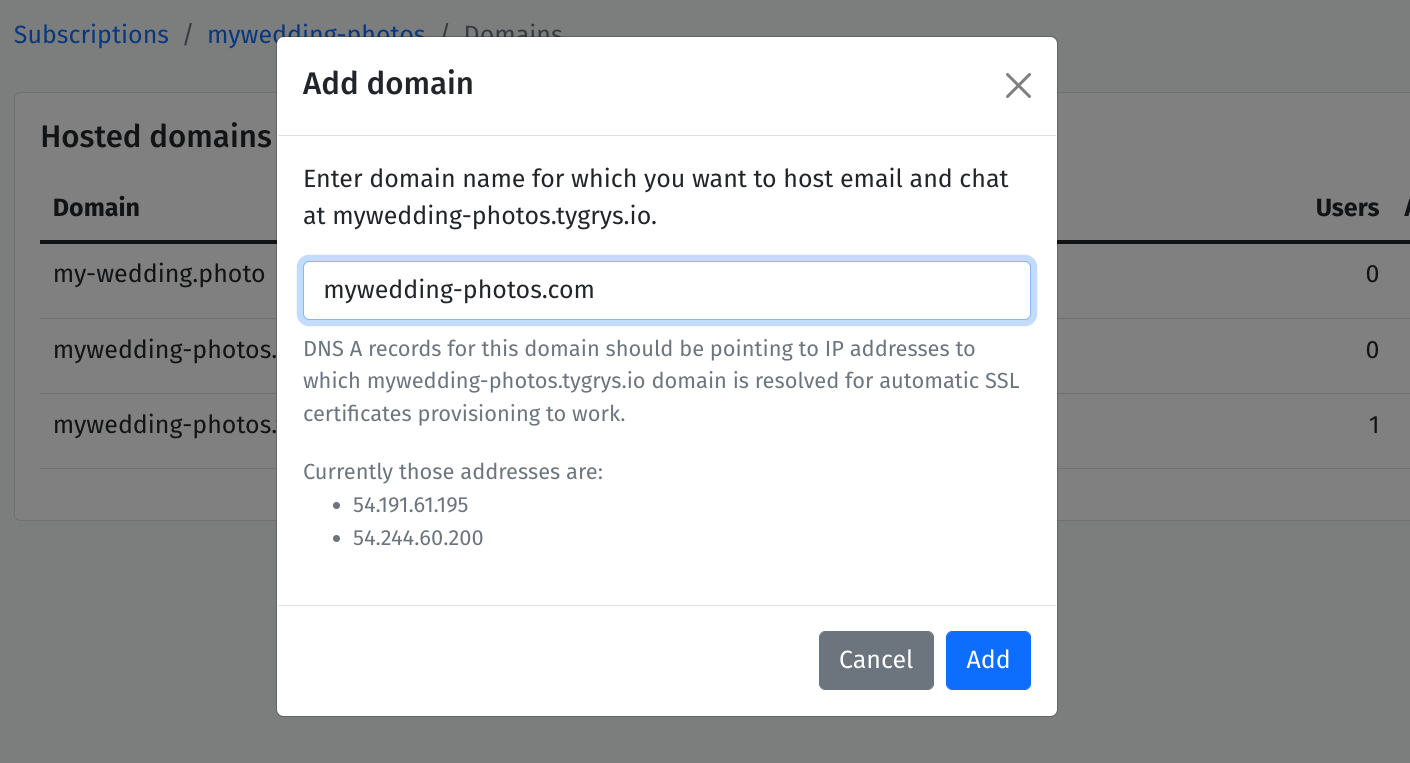 A new windows shows up where you can enter the name of the new domain.
On the windows, there is also instruction about DNS configuration for the new domain. If this looks like cryptic mambo jambo to you, do not worry. I will walk you through setting this up later.
Enter the domain name and press “Add”. It may take a few seconds for the server to process the new domain.
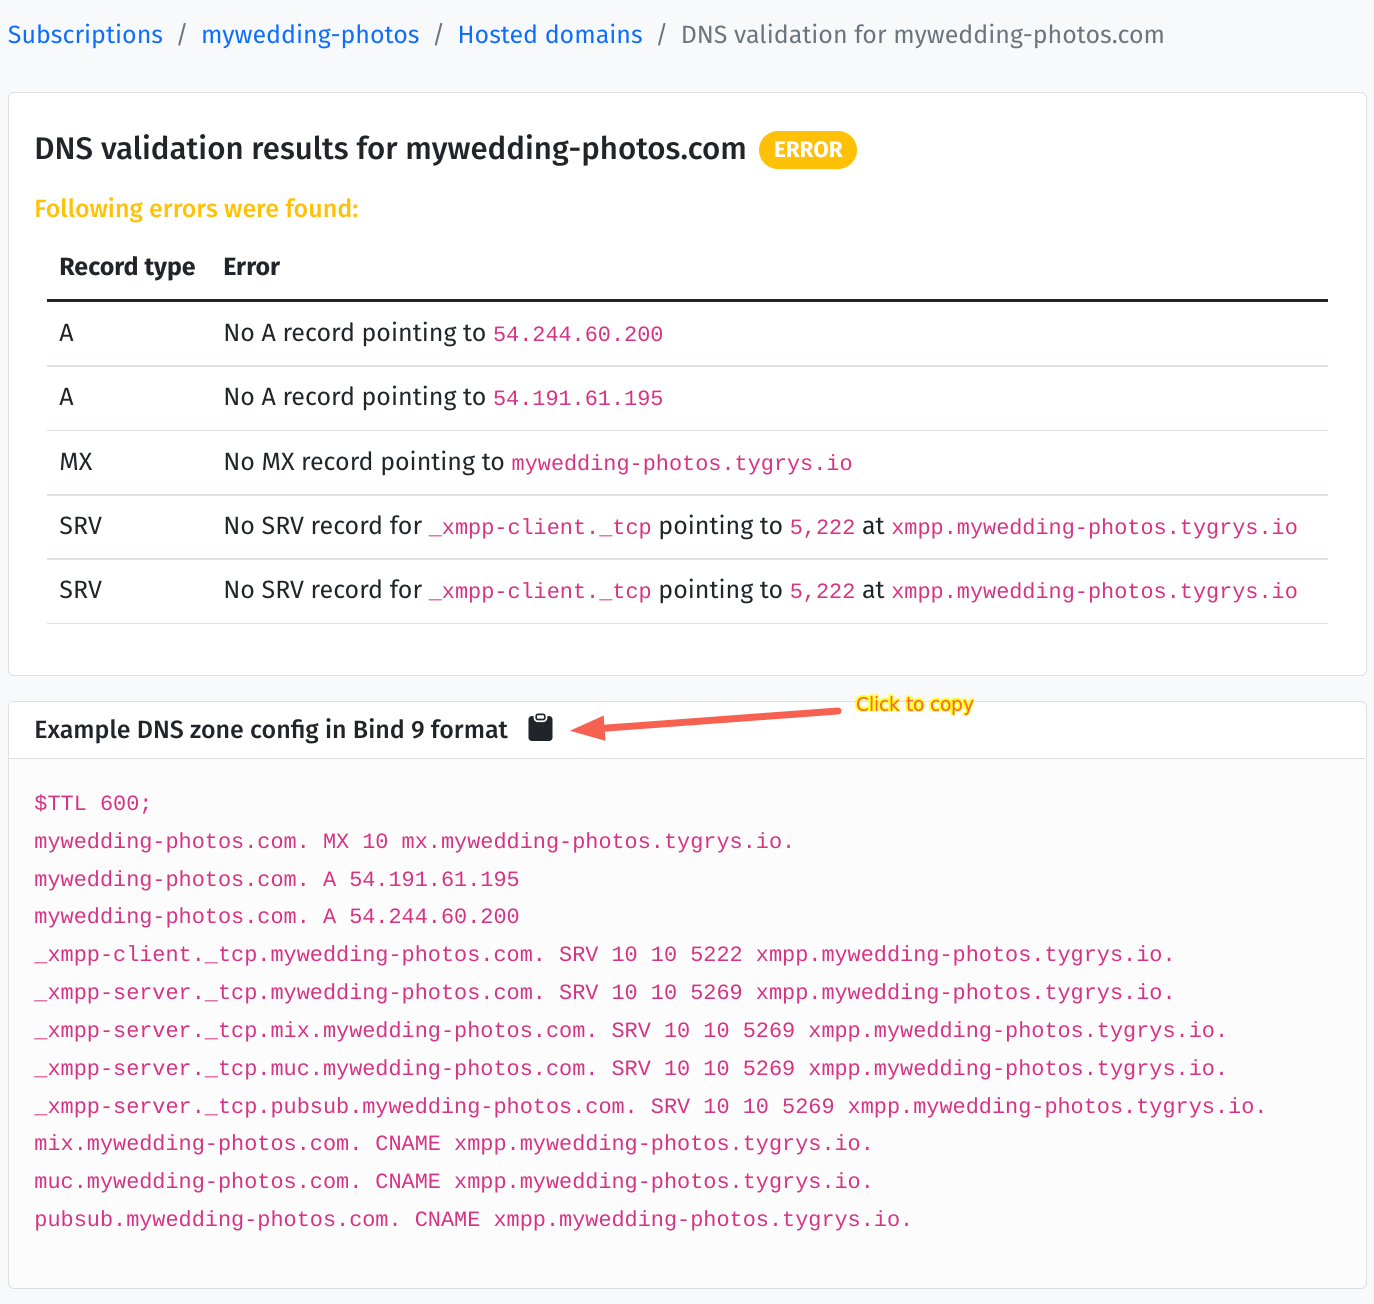 After the server accepted your new domain, it shows you page like this. Your domain is added successfully but it
shows an error. This is because your domain (internet address) does not point to this system. So anybody who
tries to email you or access your domain in any way, would not be able to.
After the server accepted your new domain, it shows you page like this. Your domain is added successfully but it
shows an error. This is because your domain (internet address) does not point to this system. So anybody who
tries to email you or access your domain in any way, would not be able to.
However, the page, except showing what is wrong, also shows how to fix it.
The text which shows below: Example DNS zone config in Bind 9 format is what you need to import to the DNS provider where the domain is purchased.
Our Peter bought his domains at Amazon Web Services (AWS). Let’s head to AWS console to see how to import the domain DNS configuration to make it work with our server.
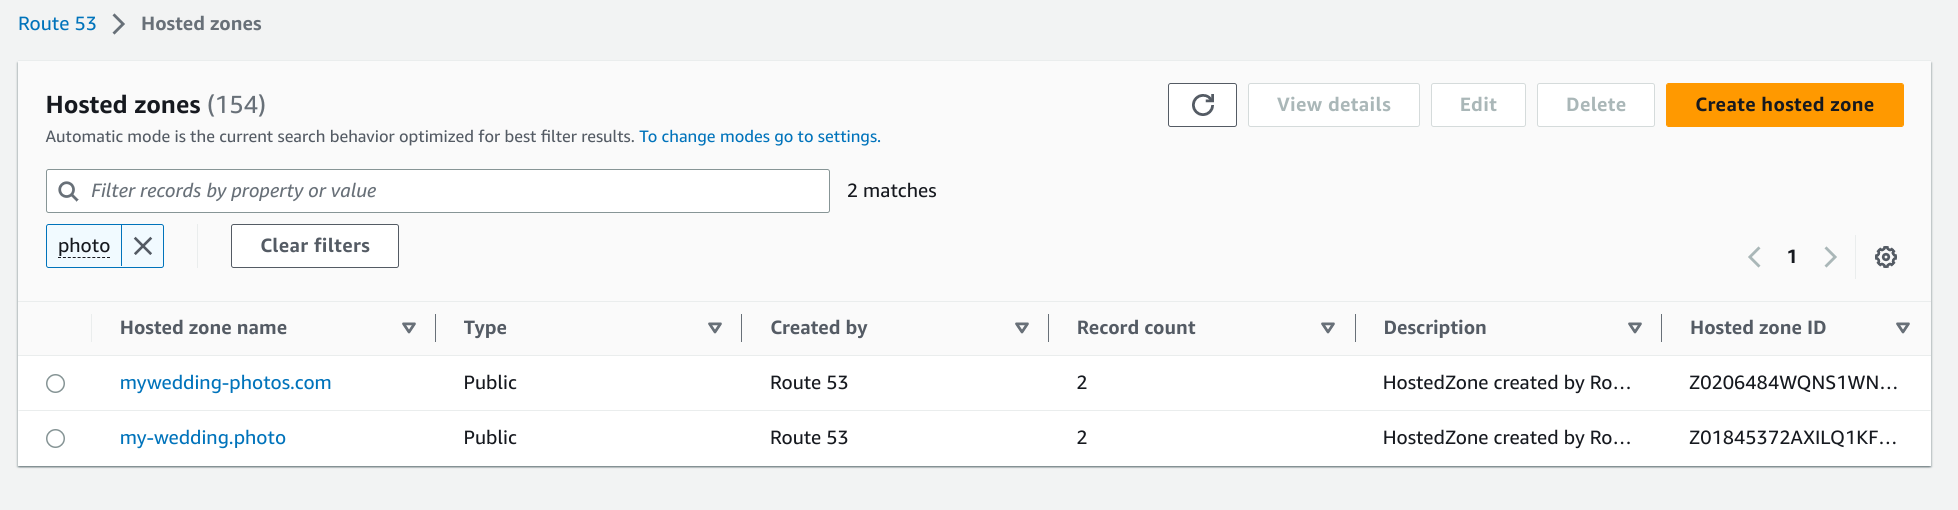 As you can see, he has 2 domains that he plans to use on his Tygrys system.
As address mywedding-photos.com was just added to the Tygrys installation, let’s configure this domain first.
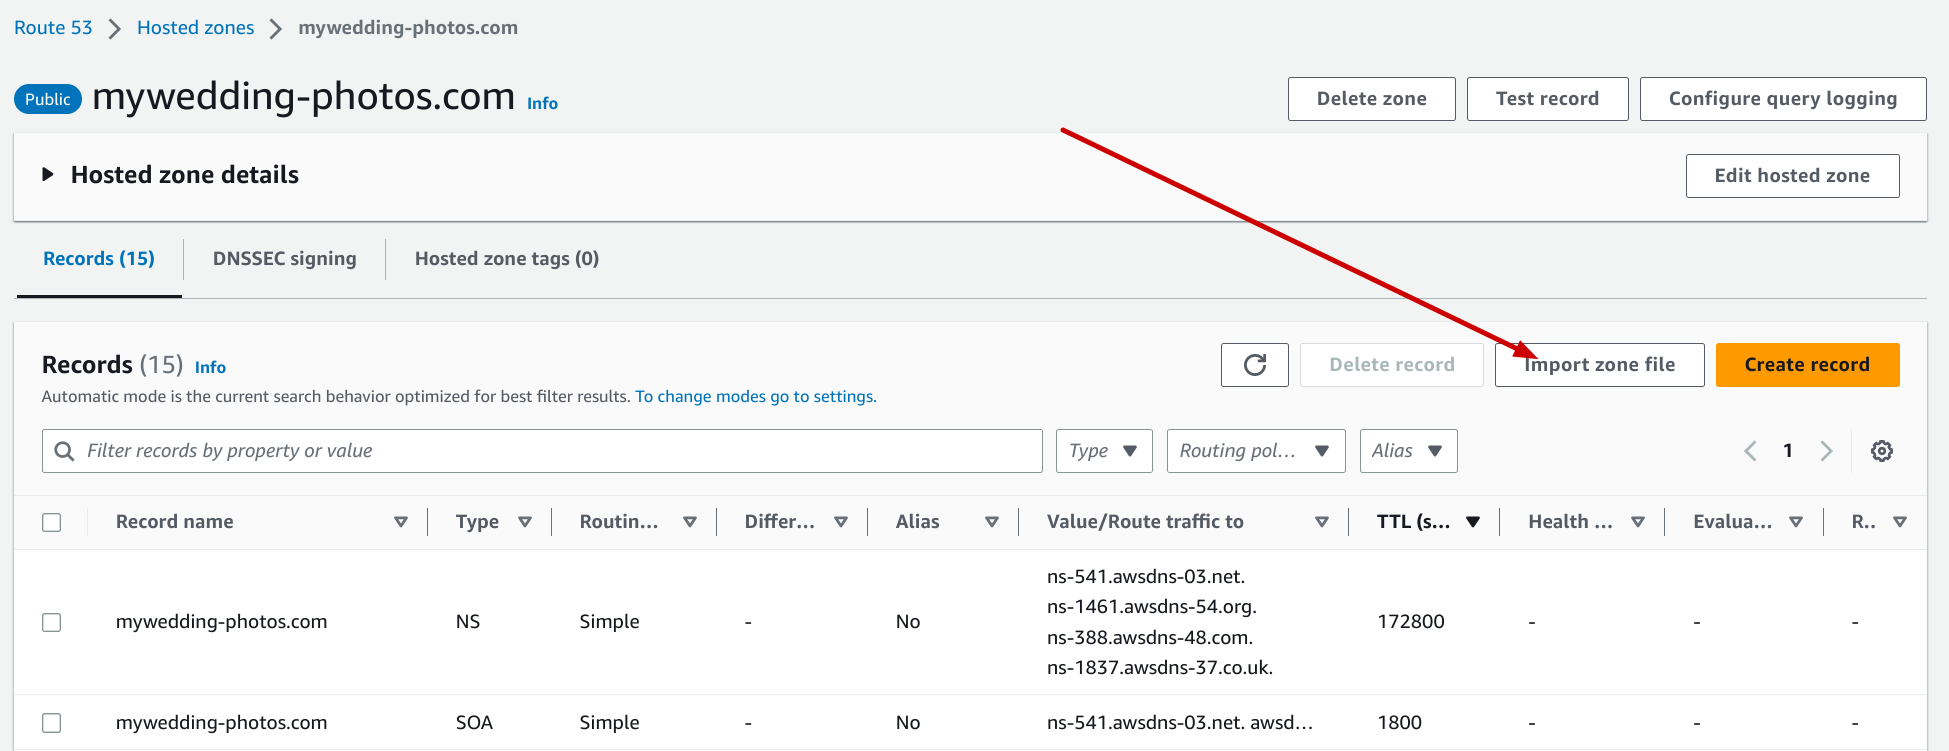 After selecting the domain, we can see the domain page with very little configuration so far.
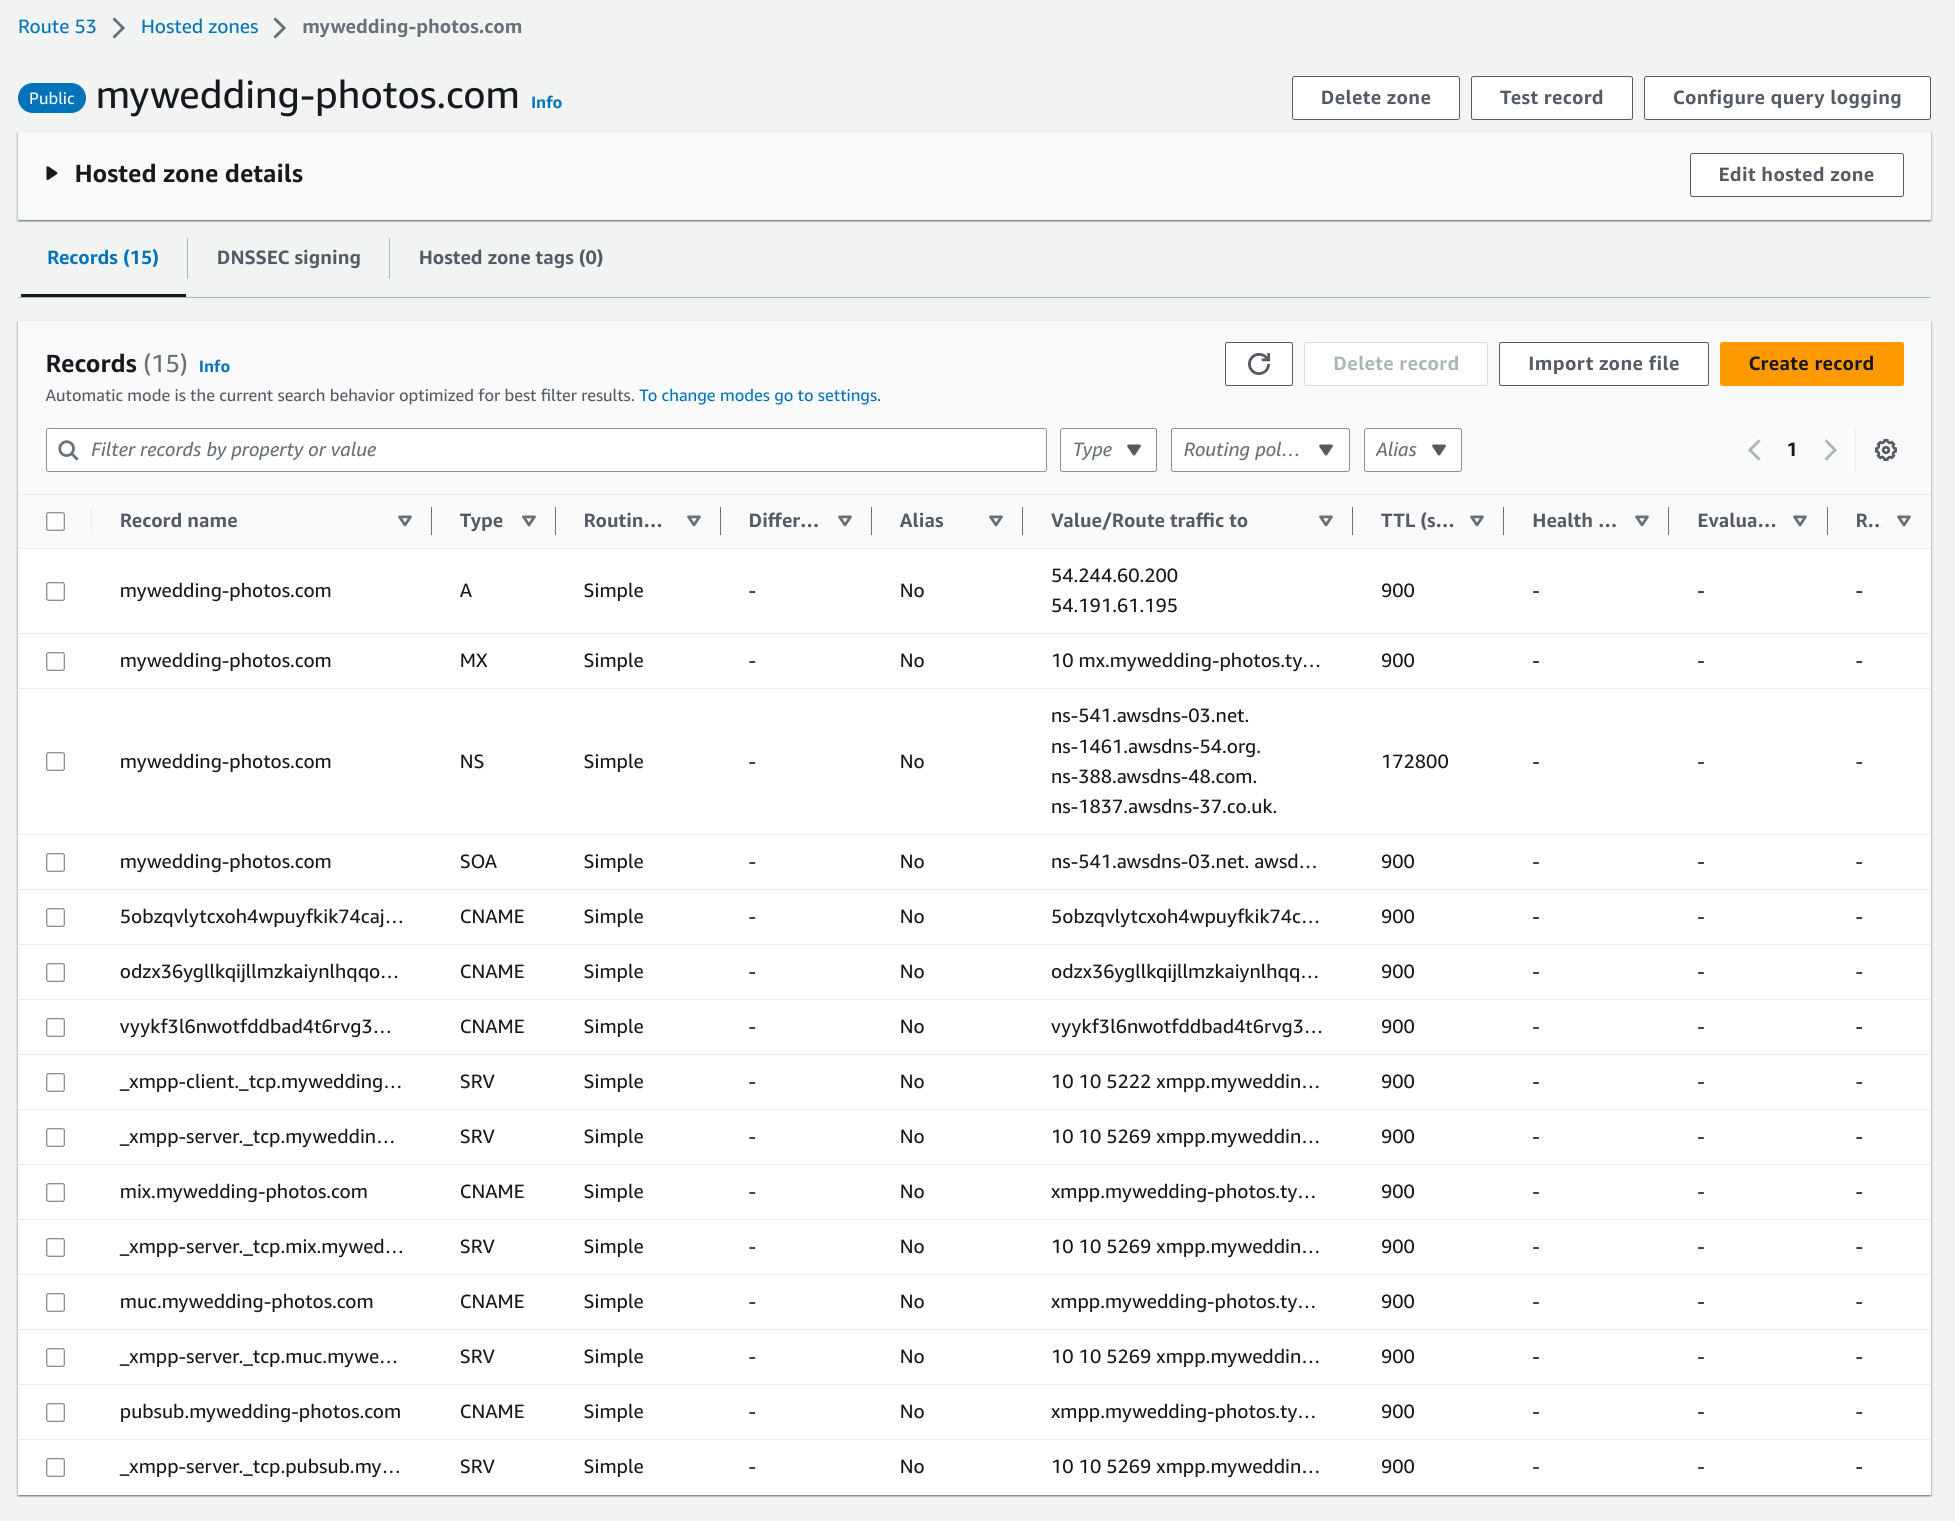
The simplest and fastest way to add all required settings is to import the example DNS zone provided by the Tygrys domain DNS check.
As the arrow shows, click on the “Import zone file” button.
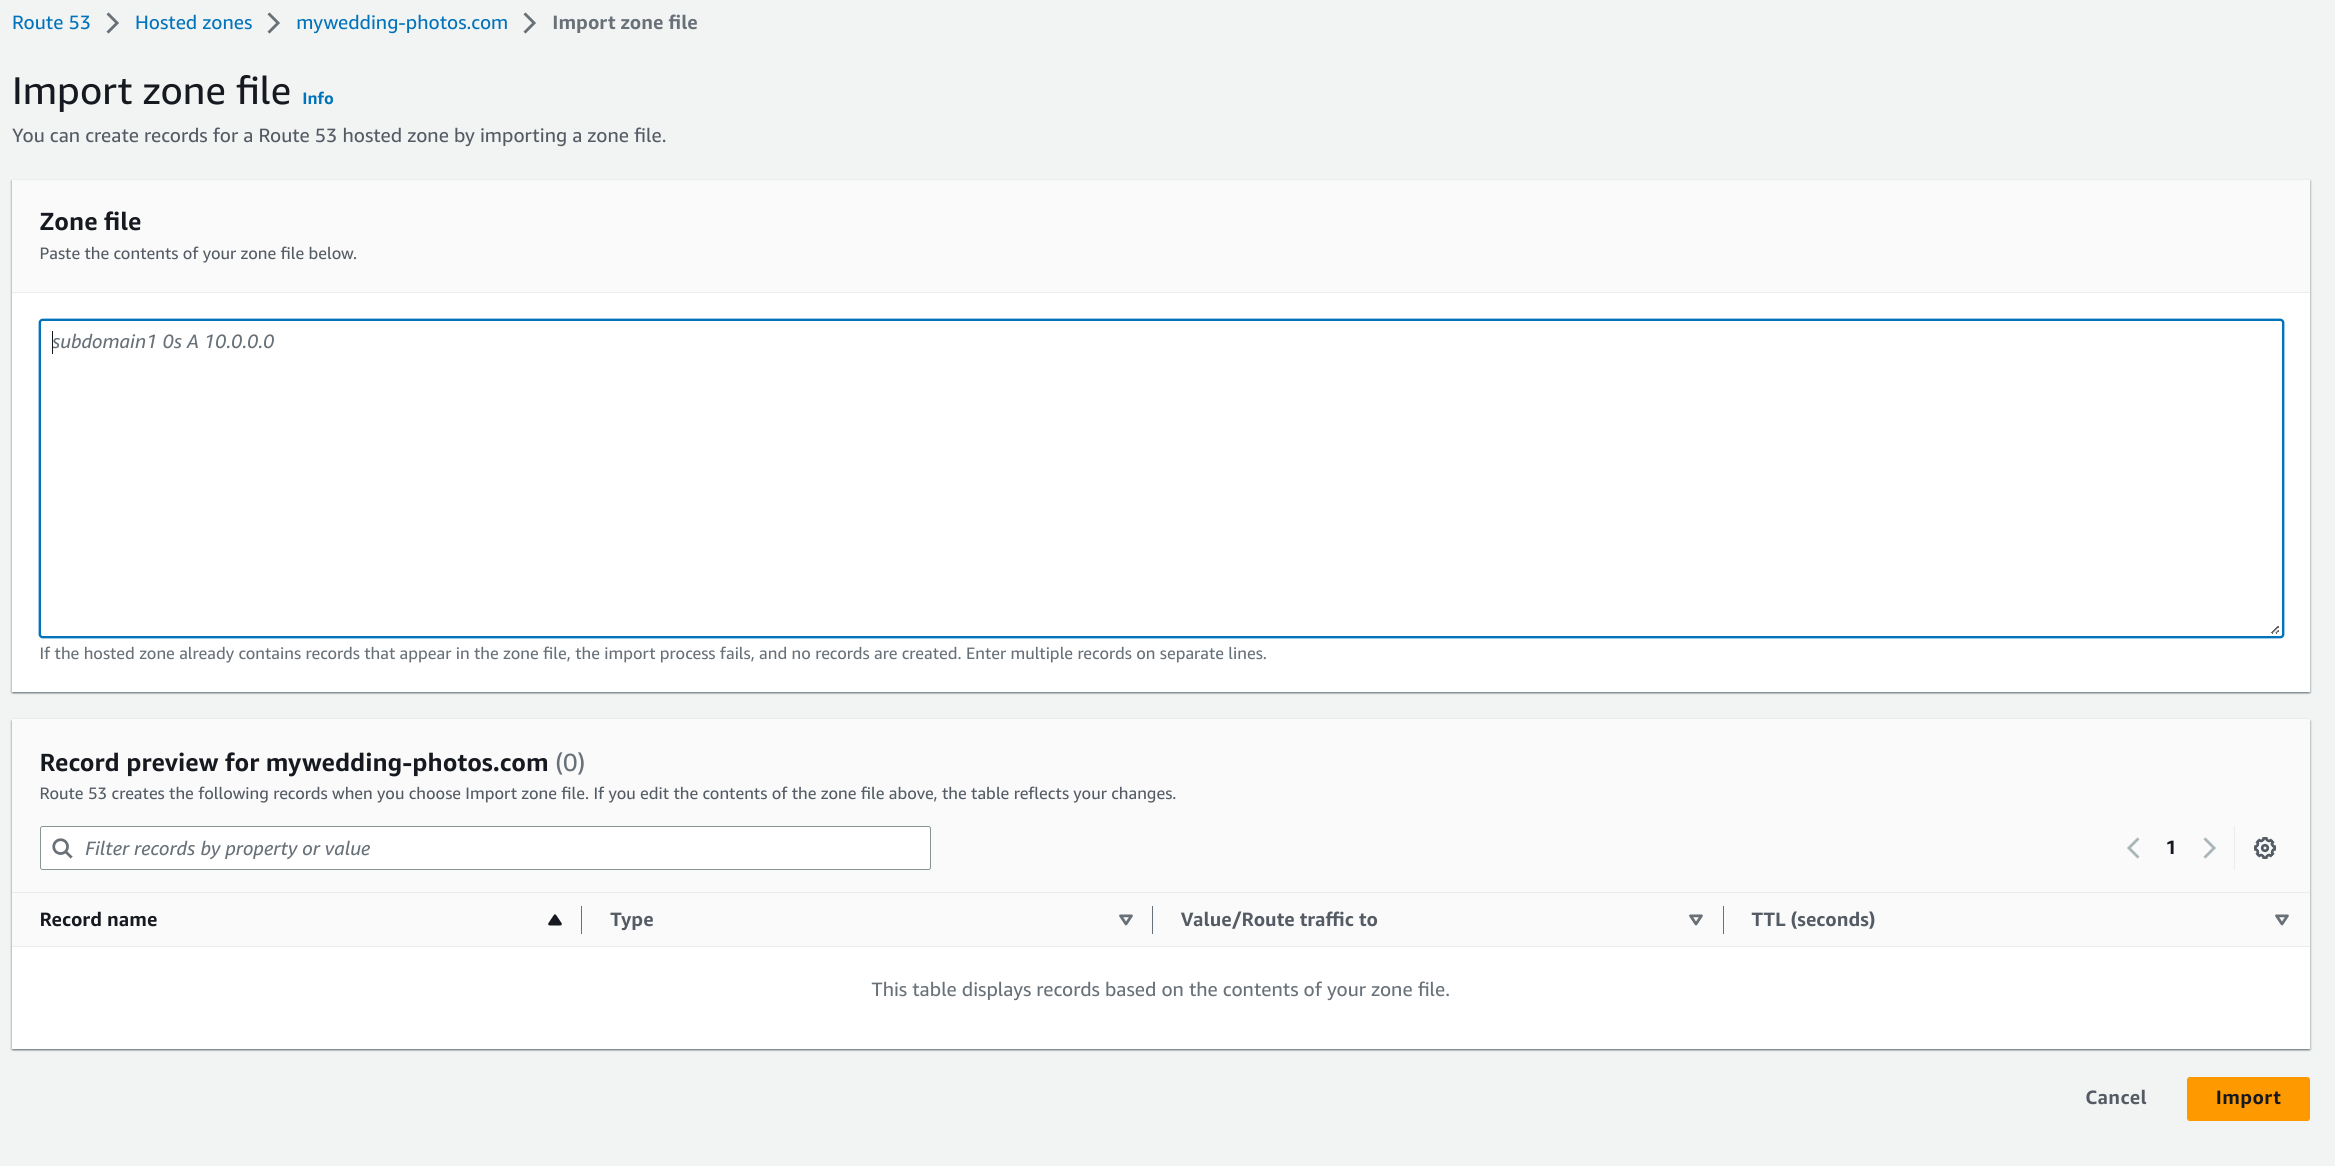 We get a page with one large text input field where we just paste the entire content of the example zone file.
Note that the Record preview for mywedding-photos.com list is empty now. It will be automatically populated by AWS once you copy the zone file content.
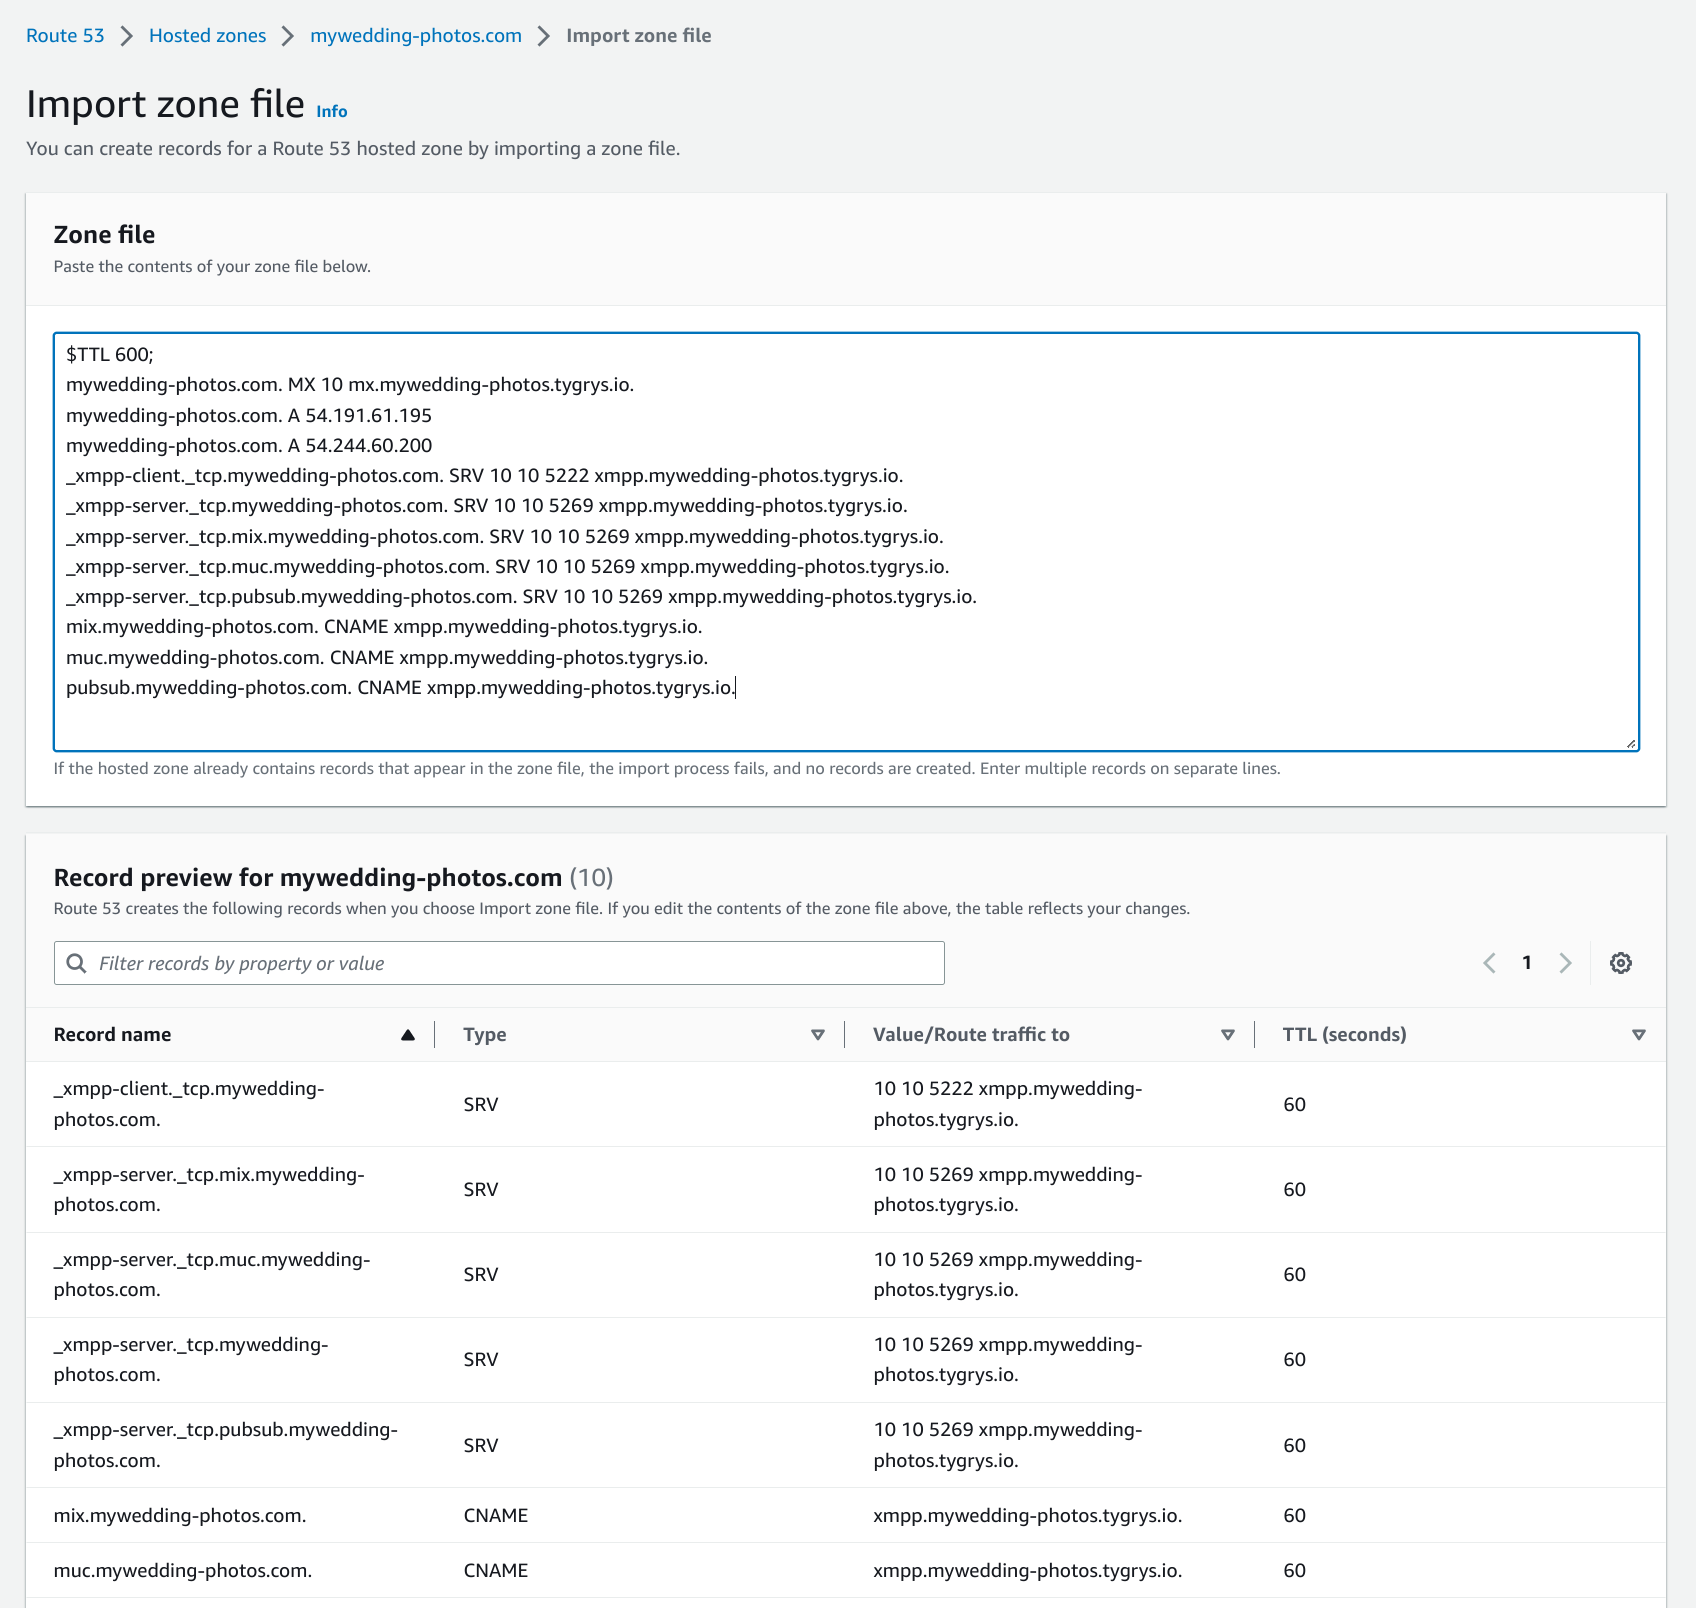 It looks like this. However, please mind the places pointed out by red arrows. Sometimes, after the copy&paste these
bits may be missing. If this happens for you, simply edit the field to add these missing bits:
It looks like this. However, please mind the places pointed out by red arrows. Sometimes, after the copy&paste these
bits may be missing. If this happens for you, simply edit the field to add these missing bits:
At the beginning of the file:
$TTL 900
And ’@’ character in front of ‘A’ records/lines.
As you can see, the part Record preview for mywedding-photos.com has been populated with information detected by AWS in the zone file you copied. Please take a moment to look at to ensure the information there is correct.
If all checks out, click the orange “Import” button.
 This is how it typically looks after successfully importing zone file.
Now the mywedding-photos.com domain is configured and fully ready to use with the Tygrys system.
Please note, it typically takes a minute or so to propagate domain configuration on the internet. However, it may take much longer than that, anything from several minutes, up to 24h in rare cases.
 Go back to the Tygrys domains page and click “Check DNS” for the just configured mywedding-photos.com domain.
If you got the same yellow error warning about no records pointing to the IP address, you need to wait a little longer for the domain configuration to be propagated. As mentioned above, it may take anything from a few minutes up to 24h.
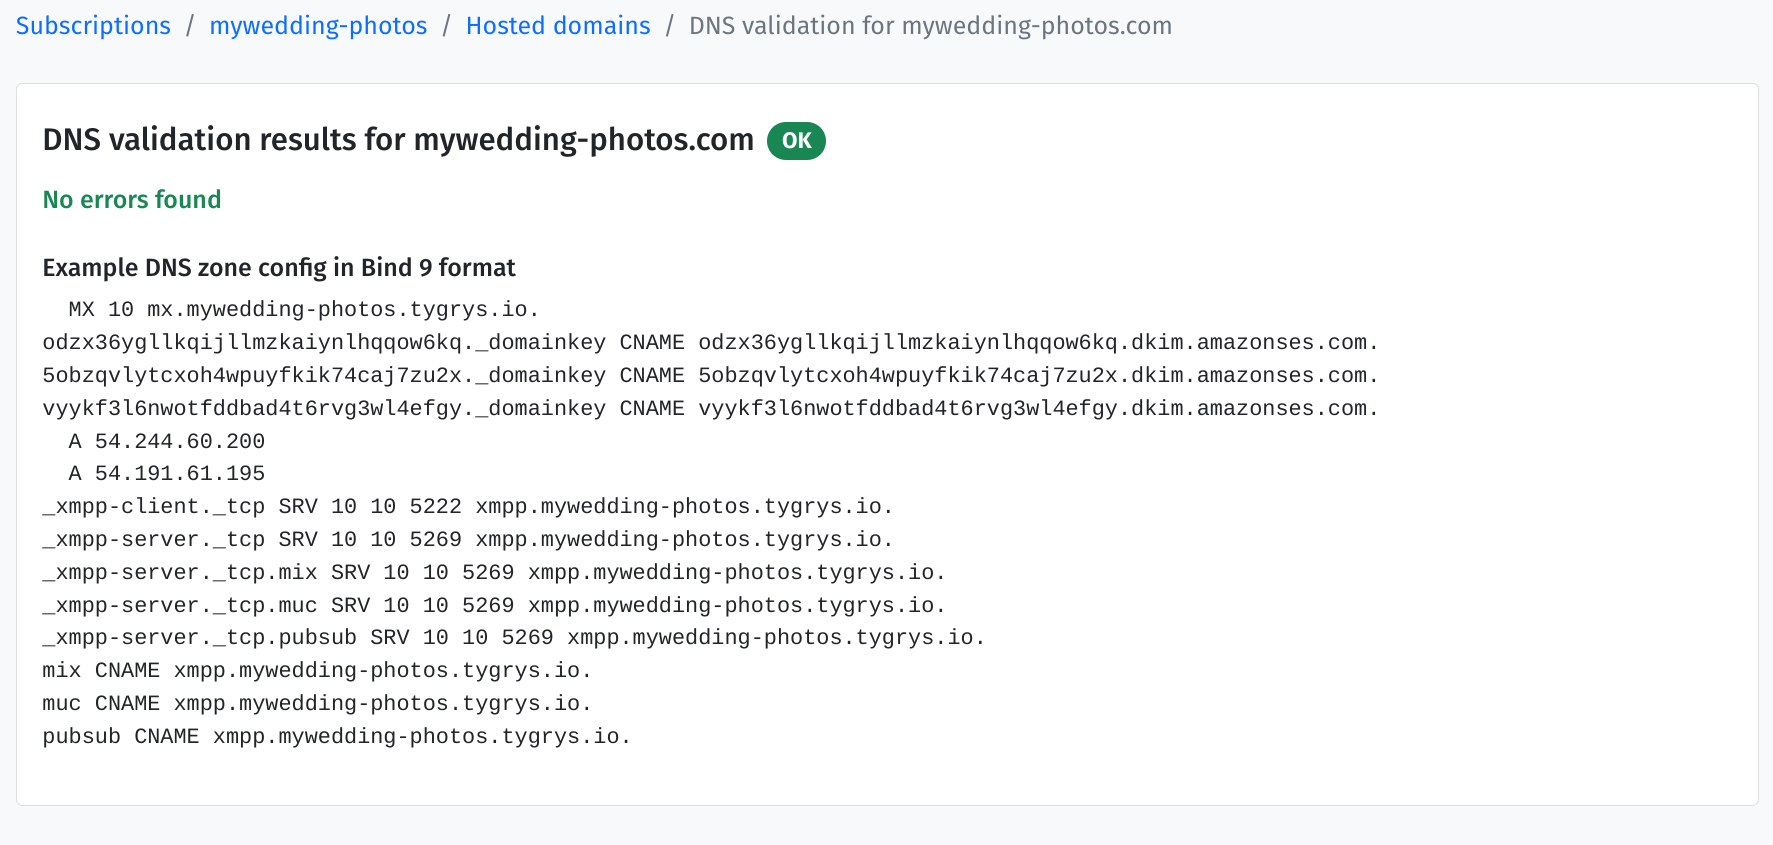 If the domain configuration is propagated to the internet, this is the page you get after DNS check. If you got to
this point, it means the domain has been successfully added, configured and ready to use.
If the domain configuration is propagated to the internet, this is the page you get after DNS check. If you got to
this point, it means the domain has been successfully added, configured and ready to use.
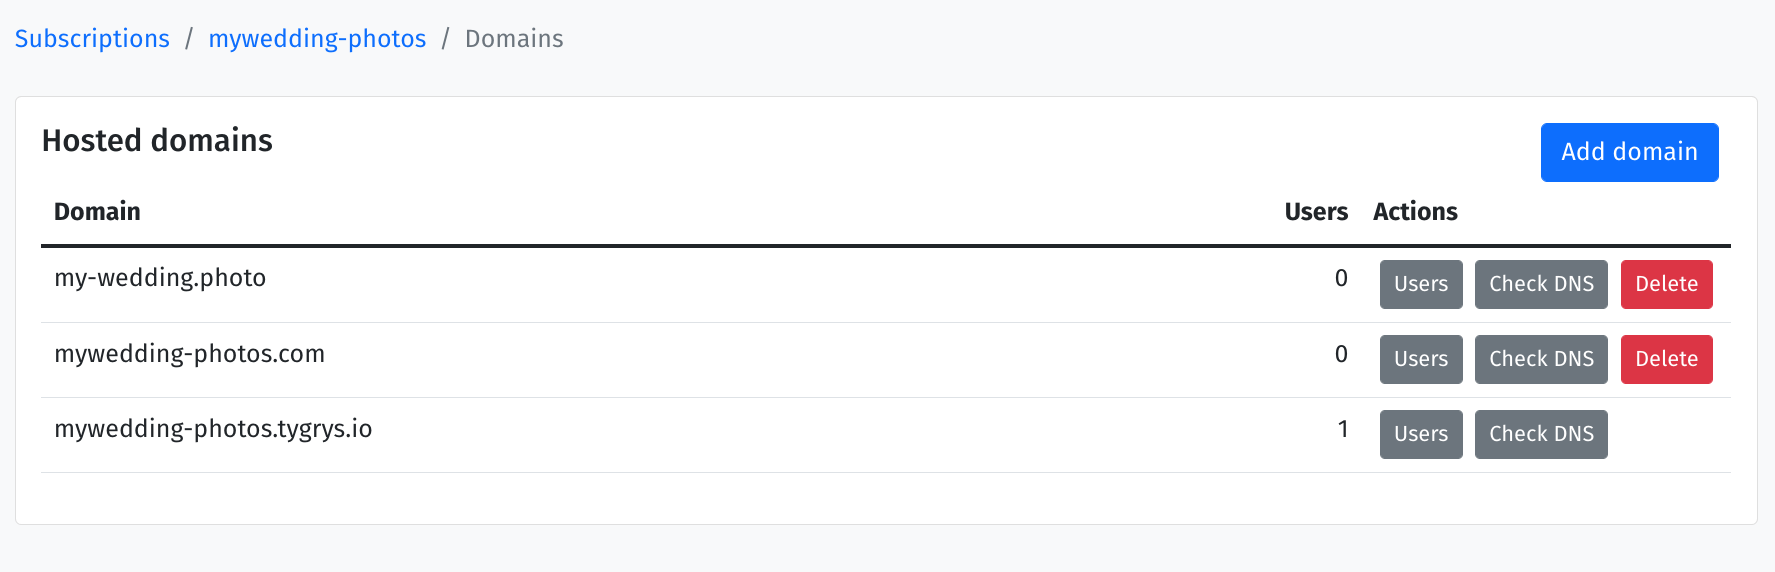 As mentioned before, Peter wanted to add 2 domains to the system. So, he repeated all the steps for the second
domain, and this is what his domains list looks like.
As mentioned before, Peter wanted to add 2 domains to the system. So, he repeated all the steps for the second
domain, and this is what his domains list looks like.
As you can see, even though, domains are in place and ready to use, there are no users added yet. Peter needs to add user accounts for himself and his team to connect to the email and other services on the system.